
Finding water around your Marvel Freezer is one of those problems that’s easy to dismiss — it’s just water, it’s a small puddle, you wipe it up and move on. That’s understandable. It’s also how a simple drain cleaning job turns into a flooring replacement and a mold remediation.
Same symptom turns up on other brands too – start with our full write-up on Frigidaire leaking water.
Water from a leaking Marvel undercounter Freezer doesn’t stay contained. It can seep under the unit and into subfloor materials, reach electrical components in the unit’s base and create a genuine safety hazard, or sit long enough in a cabinet enclosure to start growing mold before you notice it’s there. And in some cases, the water itself is a secondary symptom — a signal that a temperature control issue or a component failure is producing more defrost water than the drain system can handle.
Before you can fix a Marvel Freezer water leak, you need to know where the water is coming from. That’s the core principle of this guide. Water pooling on the floor outside the unit has different causes than water pooling inside on the bottom shelf, which is different again from water dripping at the door frame. Each location is a clue, and this guide helps you read those clues systematically.
We’ll cover the difference between true leaks and normal condensation, walk through the five most common causes of Marvel Freezer leaking water, provide a structured checklist for locating the source, and explain which fixes are owner-manageable and which require a technician.
Diagnosing the Water: Condensation, Humidity, or a True Leak?
Not every drop of water you find near a Marvel Freezer is evidence of a malfunction. Some moisture is a normal byproduct of how refrigeration works. Understanding the difference saves you from unnecessary alarm — and from misdiagnosing the actual problem.
Normal exterior condensation happens when the outer surface of the unit is colder than the surrounding air, and moisture from that air condenses on the cabinet. This is particularly common in Atlanta’s warm, humid summers. It looks like a light sweating on the exterior panels and typically evaporates on its own once ambient humidity drops. It is not a leak. However, if condensation on the exterior is heavy enough to drip onto the floor consistently, it points to a ventilation problem worth investigating — the unit may not have adequate clearance around it.
Interior frost or moisture on shelves or walls. A small amount of frost or moisture on interior surfaces is normal during a defrost cycle. But standing water on the interior floor of the cabinet, or puddles forming on interior shelves without an obvious explanation, is not normal. This typically means warm, humid air is entering the unit — usually through a compromised door seal.
A true leak produces water from a specific internal source: the defrost drain line, the drain pan, or a failed door seal that’s allowing enough warm air ingress to generate significant condensation runoff. True leaks are typically consistent — the water reappears in the same location after you wipe it up.
The table below maps water location to the most likely cause:
Where Is the Water? | Most Likely Cause |
Puddle on the floor directly under the unit | Drain pan overflowing, drain hose disconnected, or drain line blockage forcing overflow |
Water pooling inside the unit on the cabinet floor | Blocked defrost drain — water backing up instead of draining out |
Dripping at the door frame or hinge area | Faulty door seal allowing warm, humid air ingress — moisture condensing near the door |
Wet spot on the floor at the rear of the unit | Drain hose connection loose at the rear, or drain pan overflow at the back |
Light surface moisture on unit exterior | Normal condensation in humid conditions — check ventilation clearances if heavy |
Once you’ve located where the water is appearing, you’re already halfway to identifying the source. The five causes below cover what’s behind each of those locations.
Five Reasons Your Marvel Freezer Is Leaking — and What Each Looks Like
Cause 1: Blocked Defrost Drain Line
This is the most common cause of water pooling inside a Marvel Freezer cabinet, and it’s the first thing to investigate when water appears on the interior floor.
Marvel undercounter Freezers use an automatic defrost system to prevent frost buildup on the evaporator coils. During each defrost cycle, frost melts off the coils and the resulting water flows through a drain opening at the back of the interior, down a drain tube, and into a drain pan located at the base of the unit. Under normal operation, the water in the drain pan evaporates. You never see it.
When that defrost drain becomes blocked — by ice, by debris, or by a slow accumulation of dust and particles — defrost water has nowhere to go. It backs up inside the unit and collects on the interior floor. If the blockage is significant, the water eventually finds a path out through the bottom of the cabinet and appears on the floor under or in front of the unit.
Where to look: water pooling at the back of the interior floor, or a skim of water across the entire cabinet floor. Sometimes you’ll also see ice reforming at the bottom of the interior — that’s the backed-up water refreezing when the defrost cycle ends.
The basic fix — carefully thawing the drain opening with warm water and clearing visible debris — is owner-accessible. A turkey baster with warm water directed at the drain opening at the back of the interior will often break up an ice blockage. Do not use hot water or any sharp tool. If the drain clears but the problem recurs within a few weeks, there’s likely a deeper partial blockage or a defrost system issue producing more water than normal — that requires professional clearing.
Cause 2: Faulty or Damaged Door Seal
A compromised door seal is the second most common source of Marvel Freezer water leaks, and it produces a specific pattern: water appearing near the door frame, on the interior bottom shelf close to the front of the unit, or as dripping at the hinge area.
For the wider picture on this brand, see our full write-up on Marvel ice maker not working.
Here’s the mechanism: a damaged or hardened door gasket allows warm, humid air to enter the Freezer cabinet. That air, making contact with the frozen surfaces inside, immediately condenses. The resulting moisture drips and pools, usually near the door where it entered. In Atlanta’s humid climate, even a small gap in the door seal produces enough moisture ingress to create visible pooling inside the unit.
The connection is direct: if your Marvel Freezer is showing the Do alarm (door ajar), or if the door doesn’t close with the usual resistance you feel from a tight magnetic seal, a door seal failure is very likely the cause of the water you’re seeing. Warm air and water infiltration go together.
Inspect the gasket by running your hand slowly around the door frame with the door closed. You’re looking for sections that feel softer, flatter, or less springy than adjacent sections — those are areas where the magnetic strip has weakened or the gasket material has hardened and cracked. The paper test is reliable: close the door on a sheet of paper and try to pull it out. Consistent resistance around the full perimeter means the seal is working. Easy pull-out anywhere means that section of the gasket isn’t sealing.
For a full door seal diagnosis — including how to test it, what causes gasket failure, and when replacement is needed — see our Marvel Freezer door won’t seal guide. The door seal is the starting point for that article’s entire diagnostic flow.
Cause 3: Condensation From Warm, Humid Air Exposure
This cause differs from a door seal failure in an important way: the unit itself is structurally fine. The problem is environmental — the conditions surrounding the unit are putting an unusual condensation load on it.
Marvel specifies minimum clearance requirements for undercounter units: typically 3–6 inches at the sides and rear for freestanding installations, and specific front clearance for built-in cabinetry applications. These clearances exist to allow heat to dissipate from the condenser properly. When clearances are insufficient, the area immediately around the unit stays warmer than it should. A warm, poorly ventilated cabinet environment elevates condensation inside and around the unit noticeably.
In Atlanta specifically, this cause becomes most apparent during the summer months, when outdoor humidity is consistently high. A unit that shows minor condensation in winter may develop active dripping in July if ventilation isn’t adequate for the local climate. The fix doesn’t involve any component work — it’s a matter of improving airflow around the unit and reducing door-opening frequency during the most humid parts of the day.
Check that the unit isn’t positioned near a heat source — a sunny window, a range, an oven cavity. Check that the rear grille isn’t blocked by accumulated dust, which itself restricts airflow. If the unit is in a cabinet enclosure, confirm that the cabinet opening dimensions match Marvel’s built-in installation requirements for your specific model. A technician can assess whether the condensation pattern is environmental or indicative of an underlying problem.
Cause 4: Improper Temperature Settings or Thermostat Malfunction
Every defrost cycle produces a controlled amount of water that the drain system is designed to handle. When defrost cycles run too frequently, too aggressively, or outside their normal timing — because of a failing thermostat or a malfunctioning control board — they produce more water than the drain can process, and the excess backs up inside the unit.
The signs that point to this cause are temperature inconsistency alongside the water: the unit is reading warmer than its set point, the Hi alarm is activating, or you’re seeing temperature swings that don’t correspond to normal door-opening patterns. When the thermostat isn’t maintaining stable temperature, the unit oscillates between freeze and thaw states more frequently than designed. Each thaw produces water. If the drain is even slightly sluggish, repeated out-of-schedule defrost cycles will overwhelm it.
This is also worth noting if your Marvel Freezer recently had its temperature settings changed significantly — dialing the thermostat substantially colder than it has been running causes the unit to work through more defrost cycles in quick succession as it pulls the cabinet temperature down. That temporary increase in defrost water production usually resolves once the unit stabilizes at the new set temperature.
If Hi or Lo alarms are appearing alongside the water leak, the error codes article has the full diagnostic flow for those codes, including the temperature differential thresholds that trigger each alarm. See our Marvel Freezer error codes guide for the Hi alarm diagnostic.
A persistent thermostat or control board fault causing abnormal defrost cycles is a professional repair — the diagnosis requires testing the thermostat’s response range and the control board’s cycle timing, which aren’t owner-accessible checks.
Cause 5: Overfilling the Unit
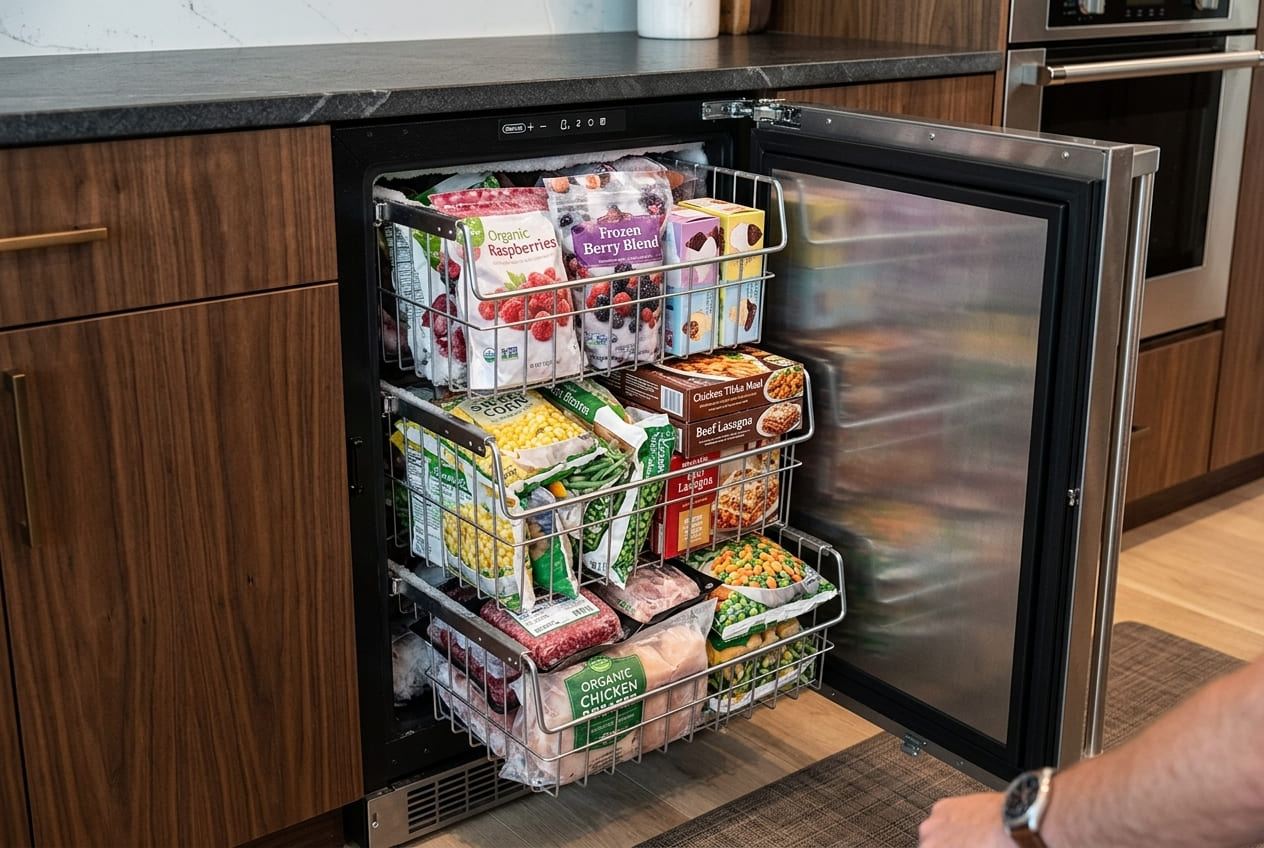
Packing a Marvel undercounter Freezer beyond its designed capacity disrupts the airflow pattern the unit relies on for efficient cooling. When airflow inside the cabinet is blocked by tightly packed items, some areas of the interior cool unevenly — certain spots stay warmer than the set temperature while others get colder. That thermal inconsistency can cause localized frost buildup in areas that aren’t reached by the normal defrost cycle. When that frost eventually melts — during a defrost period, or during a longer door-open event — it produces water in unexpected locations inside the cabinet.
The fix here is simple: reduce the load, allow adequate space between items for air to circulate, and avoid blocking the interior vents that distribute cold air from the evaporator coils. Marvel’s general guidance is not to stack items against the rear interior wall, which is where the evaporator and its frost buildup are most likely to occur. Keeping that space clear reduces the amount of frost the defrost cycle has to manage each time.
Overfilling is usually an easy call to make — if the Freezer door closes under protest, if items are visible through gaps in the door frame, or if you have to rearrange things to close the door fully, the unit is likely over capacity.
Locating Your Marvel Freezer Leak: A Three-Zone Inspection Checklist
Work through this checklist in order, starting from the easiest and most accessible zone. You’re looking for visual evidence — standing water, ice in unexpected places, wet surfaces — not listening for sounds or testing with tools. This is a visual inspection, and it takes less than ten minutes.
Zone A — Around the Unit Exterior
- ☐ Floor directly under the unit. Pull the unit out from the cabinet slightly if possible. Is water pooling under the center of the unit, toward the front, or at the rear? A rear puddle points to the drain pan or a drain hose connection; a front puddle often indicates defrost water overflowing the drain and running forward inside the cabinet.
- ☐ Rear of the unit. Look at the rear panel where the drain hose exits. Is the hose connection secure? Is there moisture or staining around the drain hose fitting? A loose drain hose connection is a common source of slow floor leaks that appear under the unit without obvious interior water.
- ☐ Bottom front grille area. Water tracking out from the bottom front grille typically comes from an overflowing drain pan. On most Marvel undercounter models, the drain pan is accessible from the front after removing the kick plate or bottom grille. Check whether the pan is full.
Zone B — Inside the Unit
- ☐ Cabinet floor (interior bottom). Is there standing water on the interior floor of the Freezer? Water pooling here almost always indicates a blocked defrost drain — the drainage path is obstructed and water is accumulating where it should be draining away. Look at the drain opening at the back of the interior for visible ice or debris.
- ☐ Rear interior wall. Is the rear wall wet, or is frost/ice forming at an unusual location — not in the normal evaporator area but lower on the wall or at the bottom rear corner? This can indicate the drain is backing up before it reaches the drain pan.
- ☐ Door frame area and bottom shelf near the door. Water or moisture concentrated near the front interior — especially on the bottom shelf closest to the door — points to warm air entry through a compromised door seal. Check the gasket along the bottom and hinge side of the door frame, where seal wear most commonly occurs first.
Zone C — Access Panel and Drain System
- ☐ Drain pan (under the unit, front grille access). Remove the front kick plate or grille and locate the drain pan at the base of the unit. Is it full or nearly full? A drain pan that is overfull and spilling is a sign that the drain system is producing more water than evaporation can clear — this happens when defrost cycles are running abnormally frequently or when the unit is in an unusually hot environment that slows pan evaporation.
- ☐ Drain tube at the rear interior. With a flashlight, look at the drain tube entry point at the back interior floor of the cabinet. Is the opening iced over? Is there visible debris at the mouth of the drain? A partial ice blockage at this point is the most common drain restriction and the most straightforward to clear with warm water.
- ☐ Drain hose routing (if visible). If you can see the drain hose behind or under the unit, confirm it isn’t kinked. A kinked drain hose restricts water flow out of the unit even when the drain tube itself is clear.
What You Can Fix — and What Needs a Technician
Part A: Owner-Accessible Fixes
- Clearing a blocked defrost drain. If the drain opening at the back interior floor of the unit is iced over or visibly blocked, warm water applied carefully with a turkey baster will typically clear the obstruction. Allow the water to drain fully, then check the drain pan to confirm water is reaching it. This is a legitimate DIY maintenance task. Do not use boiling water — the temperature differential can damage interior surfaces.
- Improving ventilation clearances. If inadequate clearance around the unit is contributing to condensation, adjusting the unit’s position or cabinet cutout dimensions is owner-manageable. Confirm the clearances against the specifications in your model’s installation guide before repositioning.
- Reducing overfill. Straightforward — reduce load, keep air circulation paths open around items and away from the rear interior wall.
- Adjusting temperature settings. If the set temperature was recently changed significantly, allow 24–48 hours for the unit to stabilize before concluding there’s a fault. Returning to the previous setting and allowing stabilization first is a reasonable step before calling a technician.
- Emptying an overfull drain pan. The drain pan can be slid out on most Marvel models once the front grille is removed. Emptying and cleaning the pan removes an immediate overflow risk while you investigate the root cause.
Part B: Repairs That Require a Professional
- Replacing the door seal (gasket). If a faulty door seal is confirmed as the water source, replacement on most Marvel undercounter Freezer models involves working with an embedded snap-clip retainer system inside the door liner. Attempting to remove the gasket without knowing the correct method for your model risks cracking the door liner — an expensive secondary damage. The replacement itself is straightforward for a technician; the access method is model-specific.
- Clearing a persistent drain line blockage. If the defrost drain reopens after warm water treatment but re-ices within days, there’s an underlying issue: either the drain heater element (on models equipped with one) is failing to keep the drain clear between defrost cycles, or the defrost system timing is off. Both require diagnosis beyond what’s owner-accessible.
- Repairing or replacing a cracked drain pan. A cracked drain pan drips continuously from the base of the unit. Replacement requires removing the front grille, sliding out the pan, and installing the correct replacement part for the specific model.
- Diagnosing a thermostat or control board fault producing abnormal defrost cycles. If temperature inconsistency is generating excess defrost water, identifying and correcting the root cause requires testing the thermostat’s response calibration and the control board’s cycle timing — professional diagnostic work.
- Any sealed system or refrigerant-related diagnosis. If water leaks are accompanied by warm temperature readings that can’t be explained by door seal or defrost cycle issues, a refrigerant system problem may be the underlying cause. Refrigerant diagnosis and handling requires EPA certification — this is not a DIY repair under any circumstances.
One additional note worth taking seriously: a Marvel Freezer that has been leaking for weeks — particularly if it’s in a cabinet enclosure — may have exposed wiring harnesses in the base of the unit to standing water. If the unit has been dripping for an extended period, a thorough internal inspection by a technician is warranted before simply clearing the drain and moving on.
Conclusion
The most important thing you can do with a Marvel Freezer leaking water is resist the impulse to treat symptoms — wiping up puddles without locating the source — and instead follow the water backward to where it’s coming from. The three-zone checklist in this guide does that systematically. Interior floor pooling means the defrost drain. Door-area moisture means the gasket. Floor puddles concentrated at the rear mean the drain hose or pan. Once you’ve identified the zone, the five causes narrow it further.
Some of what you find will be fixable without calling anyone: a drain flush with warm water, a drain pan emptied, a ventilation adjustment, a minor temperature setting correction. Others — a compromised gasket, a persistent drain blockage, an abnormal defrost cycle, a cracked drain pan — are professional repairs, and doing them correctly the first time is worth the service call.
One final note on timing: water damage compounds. A slow drip that’s been running for two weeks does more damage to a cabinet floor than the same drip caught in day two. And a water leak that seems minor on the surface sometimes points to a more significant component issue — abnormal defrost cycling, a failing control board, or a sealed system fault — that only gets more expensive to repair if left unaddressed.
Related guides
FAQ
1. There is water pooling on the interior floor of my Marvel Freezer — but the floor under the unit is dry. What's causing this?
Interior pooling without exterior leakage is almost always a blocked defrost drain. Water is accumulating inside the cabinet rather than draining through the drain tube to the drain pan below. The drain is blocked at the drain opening — check the back interior floor of the unit for a small drain opening and look for ice or debris covering it. Thawing the drain opening with warm water (a turkey baster works well) usually resolves the immediate blockage. If it refreezes within days, the drain heater or defrost system timing may need professional attention.
2. My Marvel undercounter Freezer is dripping at the front bottom — is this normal?
No — front-bottom dripping is not normal operation. It most commonly indicates the drain pan at the base of the unit has overflowed and water is tracking out along the bottom front edge. Remove the front grille or kick plate, locate the drain pan, and check whether it’s full. A full drain pan that refills quickly means the defrost system is producing excess water — either because defrost cycles are running too frequently or because the drain pan environment isn’t allowing normal evaporation. A technician should evaluate the defrost system timing.
3. I just installed a new Marvel Freezer and it's already showing condensation inside. Is this a defect?
Probably not. All Freezer units produce some interior condensation during the first 24–48 hours of operation as the cabinet temperature stabilizes from ambient temperature down to its set point. Marvel advises allowing up to 48 hours for the unit to reach its set temperature. If heavy condensation persists beyond 48 hours, check door seal alignment — the gasket should be compressed evenly around the full perimeter — and confirm ventilation clearances match the installation specifications (typically 3–6 inches at sides and rear for freestanding installation). Only if significant condensation continues beyond proper setup and stabilization should you consider a service call.
4. The floor under my Marvel Freezer is wet, but I can't see any obvious water source inside the unit. Where should I look first?
Floor-only leaks with no visible interior source almost always originate at the rear of the unit. Pull the unit out from the cabinet and inspect: check the drain hose connection at the rear where it exits the unit (a loose or disconnected hose drips slowly and consistently), and check the drain pan position and condition (a cracked pan drips from the base). If the unit has been in place for a long time, the drain pan itself may have cracked from age or thermal cycling. Pulling the unit out for a rear and underside inspection is the right first step — these connections are not visible with the unit pushed in.
5. My Marvel Freezer started leaking after Atlanta had a stretch of very hot, humid days. Is the weather actually causing this?
Yes, to a point. High external humidity increases the condensation load on any refrigeration unit — more moisture in the air means more potential condensation inside when warm air enters through a door opening or a marginal seal. If the door seal is in good condition and ventilation clearances are adequate, a humid week may produce more visible surface moisture than usual, but not an active leak. However, if the unit is generating enough water to pool on the floor or inside the cabinet during a humid period, the weather has most likely exposed an underlying weakness — a marginal door seal or a partially blocked drain — that wasn’t causing visible problems in drier conditions. Inspect the gasket and the defrost drain, and call a technician if the leak continues after the humidity breaks.