
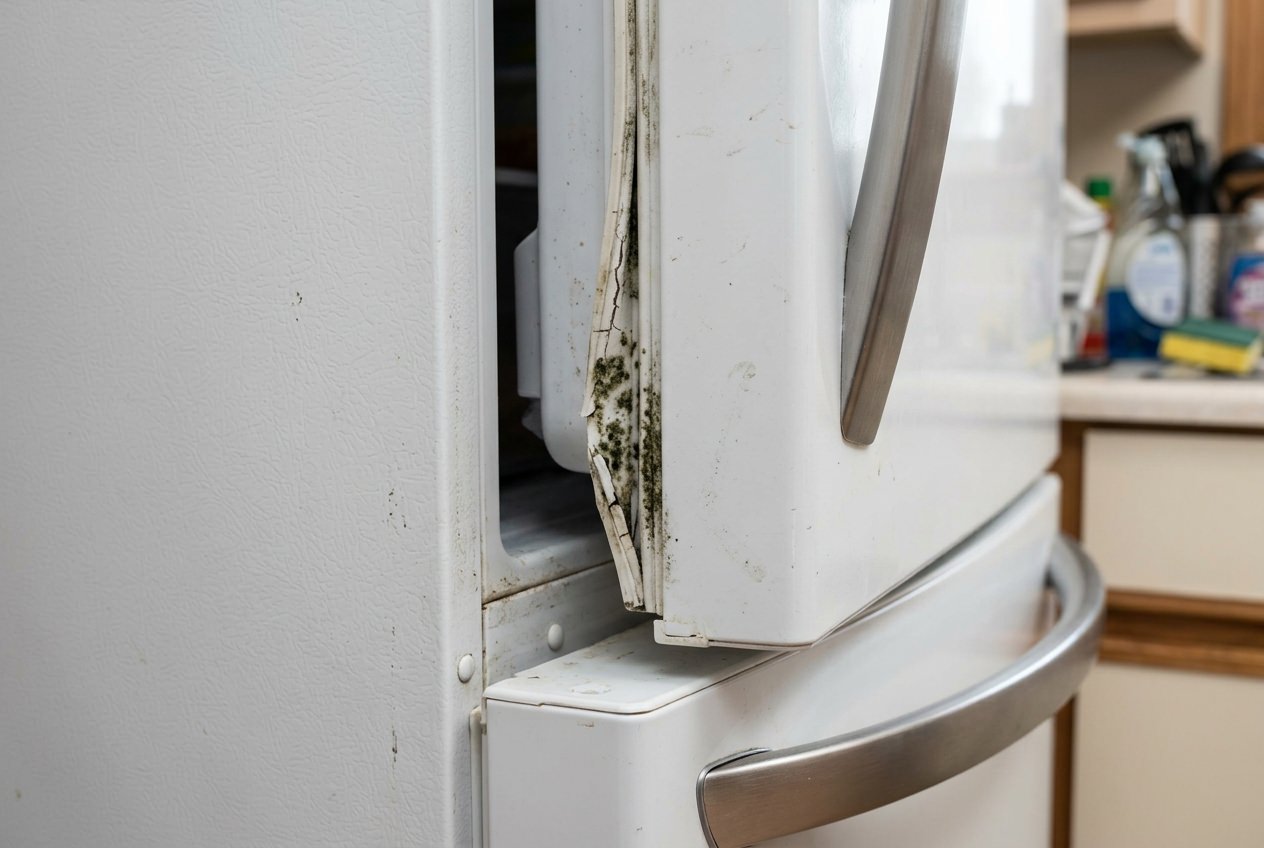
At LG, the philosophy is simple: technology should enhance your life, not complicate it. Your refrigerator is a sophisticated ecosystem designed to preserve the vibrant flavors of your groceries. Central to this performance is the LG door seal. While it may look like a simple strip of vinyl, it is a precisely engineered magnetic gasket designed to create a thermal vacuum.
Same symptom turns up on other brands too – start with our GE freezer door not sealing guide.
When this seal functions perfectly, it locks in the cold and keeps the ambient humidity of a Georgia summer at bay. Let’s reckon a little: even a microscopic gap in that seal forces your high-tech Linear Compressor to run continuously, leading to unnecessary wear. We’ll show you how to maintain that “Life’s Good” standard by ensuring your fridge remains an airtight sanctuary for your food.
Symptoms of a Compromised Barrier: Is Your Efficiency Leaking?
Before we pick up a plastic putty knife, we must first diagnose the health of your appliance. A failing door gasket doesn’t always show obvious tears immediately. Sometimes, the failure is subtle. Read on to know more about the warning signs that indicate your unit is struggling:
- Persistent Moisture on the Mullion: If you see sweat on the vertical strip between the French doors, the thermal break is failing.
- The Hissing Sound: In a quiet kitchen, you might actually hear the faint sound of air rushing into the cabinet.
- Erratic Internal Temperatures: If your milk is on the edge of spoiling or your greens are wilting faster than usual, the seal is the primary suspect.
- Magnetic Fatigue: Over 10-15 years, the magnets inside the gasket can lose their “snap,” failing to pull the door tight against the metal frame.
Technical Focus: The LG LFXS Series (lawsuit) and Cooling Reliability
For many homeowners in Atlanta, the LG LFXS Series (lawsuit) has been a topic of much discussion. While the focus of legal challenges often centered on the compressor’s durability, as experts, we know that an appliance is only as strong as its weakest link. A failing LG door seal in these specific models puts an immense thermal load on the compressor.
If your LFXS series model is struggling to maintain temperature, we’ll get things clear: check the gasket first. Ensuring the seal is airtight is the most cost-effective way to protect your compressor and ensure the longevity of your investment. By prioritizing frost buildup prevention through a healthy seal, you are effectively “bulletproofing” your fridge against the common stressors mentioned in these technical disputes.
The Logistics of Repair: Why Gasket Parts Are Non-Negotiable
When it comes to parts, there is no room for compromise. At Appliance Repair Master, we exclusively use gasket parts. We’ll describe why this matters: generic gaskets often use lower-grade vinyl that doesn’t handle temperature fluctuations well. Furthermore, the magnetic strips in “universal” seals are frequently too weak to trigger the door sensors on LG’s smart-control panels.
The Genuine-Parts Advantage:
- Perfect Geometry: Designed to fit the exact dimensions of your model’s track.
- Optimized Magnetism: Precisely calibrated to match the pull strength of your fridge’s steel frame.
- Chemical Stability: LG’s vinyl is treated to resist the oils and acids found in common kitchen spills.
The Technician’s Warning
Many homeowners ignore a small gap, thinking it’s purely cosmetic. But micro-leak causes the evaporator coils to “ice over” within 48 hours. This forces the fridge into a perpetual defrost cycle, eventually burning out the control board. Identifying the leak is easy; stopping the chain reaction is where professional calibration is required.
For many homeowners in Atlanta, the LG LFXS Series (lawsuit) has been a topic of much discussion. While legal challenges centered on the compressor’s durability, an appliance is only as strong as its weakest link. A failing LG door seal in these specific models puts an immense thermal load on the compressor.
The Logic of Professional Intervention:
If you own an LFXS model, the margin for error is zero. An improperly installed DIY gasket can lead to short-cycling. To protect your investment and maintain your standing for any potential warranty claims, ensuring the seal is professionally calibrated is the most cost-effective way to bulletproof your fridge.
Preparation Protocol: Setting the Stage for Success
Precision repair begins with preparation. You wouldn’t want to rush a technical task without the right environment. Before beginning your door gasket installation, follow this checklist to ensure a seamless experience.
The Essential Preparation Checklist:
- Model Verification: Locate the sticker inside the refrigerator wall to confirm your exact model number.
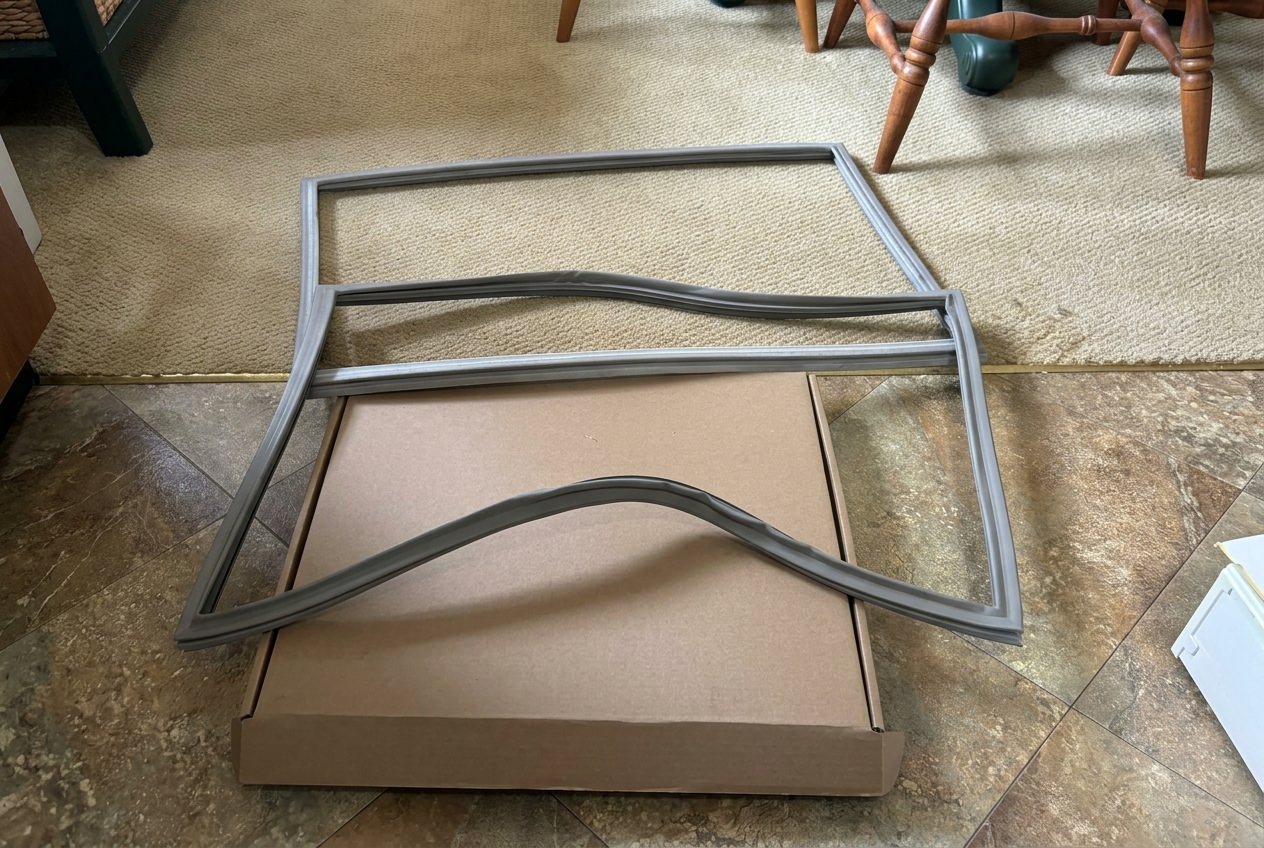
- Part Inspection: Unbox your new lg door seal and lay it flat for 24 hours. This allows the shipping kinks to relax naturally.
- Clearance: Remove all items from the door bins. A heavy door can sag during the repair, throwing off the alignment.
- Sanitization: Have a bowl of warm, soapy water and a microfiber cloth ready. Installing a new gasket into a dirty track is a recipe for failure.
- Safety First: Unplug the unit. While this is a mechanical repair, you’ll be working near the mullion’s heater wires.
For the wider picture on this brand, see our full write-up on LG LFXS Series problems.
The Master Guide: Step-by-Step LG Door Seal Replacement
We’ll show you how to execute this repair with the same precision as our master technicians. Let’s dive into the technical process.
Phase 1: Mullion Removal and Electrical Disconnection
On most LG French Door models, the left-side door features a folding vertical strip called the mullion. This component contains a small heater to prevent condensation.
- Remove the single screw holding the mullion hinge cover in place.
- Slide the mullion upward to release it from the retaining clips.
CRITICAL WARNING: Locate the wire harness. These wires are extremely thin. One aggressive tug can snap the connection, requiring a total door replacement costing upwards of $600. If the plug does not release easily, stop and call a technician.
Phase 2: Extracting the Old Door Gasket
Using your plastic putty knife, you will begin the removal process.
- Insert the knife under the inner edge of the gasket at the top corner.
- Gently pry upward until the gasket pops out of its track.
The Danger Zone: If you use a metal knife or apply too much pressure, you can puncture the plastic door liner. A punctured liner allows moisture into the foam insulation, which can cause the door to rot from the inside out.
Phase 3: Precision Door Gasket Installation
This is where the transformation happens.
- Start at the top two corners. Press the new gasket firmly into the track.
- Move to the bottom two corners. By securing the corners first, you prevent the gasket from “bunching up” on one side.
- Use your thumbs to press the seal into the track along the perimeter. You should feel it “lock” into the grooves.
- If the gasket feels too stiff, don’t force it—this is where our next technical tip comes into play.
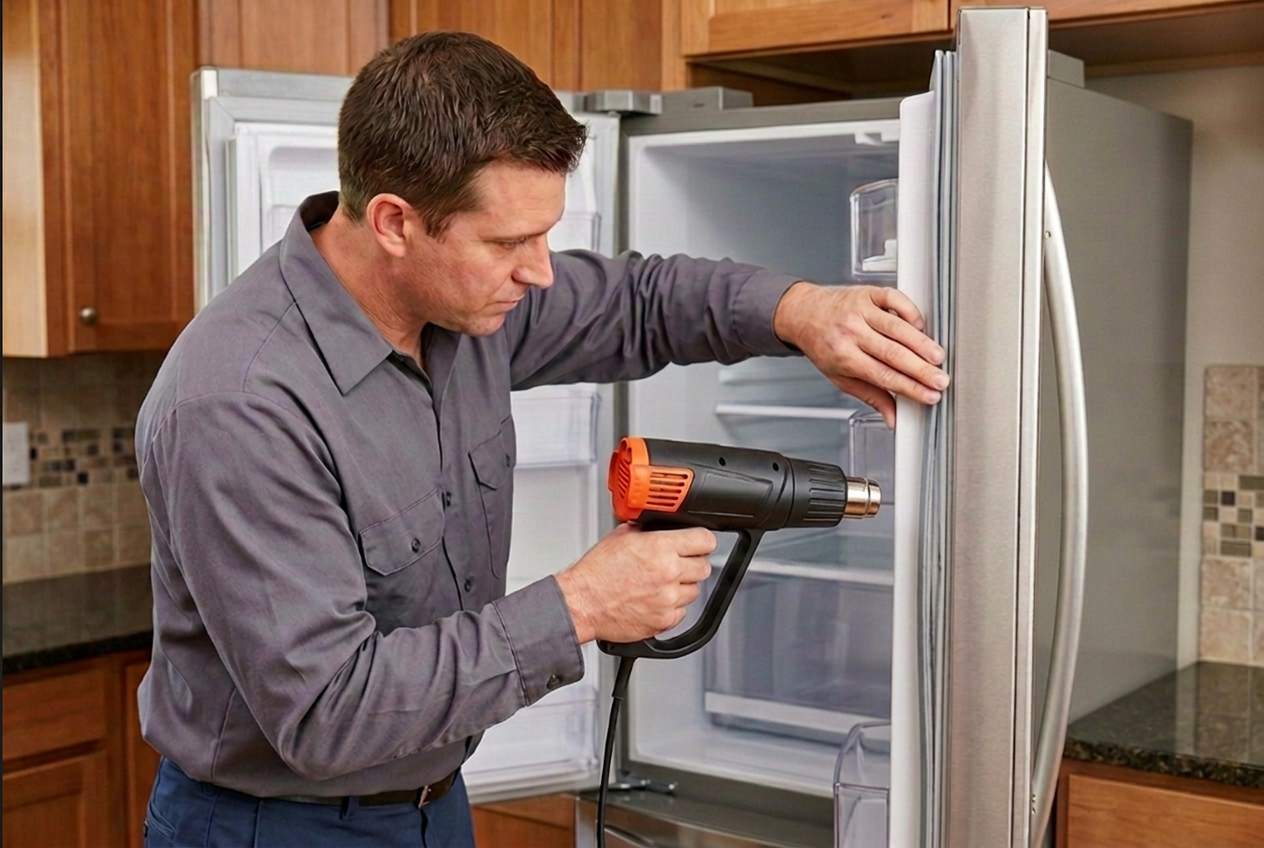
Thermal Calibration: The Art of Warming with a Hairdryer
This is the “secret sauce” of professional appliance repair. Because gaskets are shipped folded, they often have small gaps when first installed. Warming with a hairdryer is the industry standard for custom-fitting a new seal.
How to perform thermal calibration:
- Identify any gaps where the seal isn’t touching the fridge frame.
- Set your hairdryer to a medium, steady heat.
- Move the dryer back and forth along the vinyl (about 3-5 inches away) until the material becomes soft and pliable.
- Close the door. The internal magnets will now pull that softened vinyl flush against the frame.
- Leave the door closed for at least 30 minutes to allow the gasket to “set” its new shape.
The Physics of Cold: Strategy for Frost Buildup Prevention
Why do we care so much about a perfect seal? It’s all about frost buildup prevention. When warm, humid Atlanta air enters your freezer, it instantly turns into ice. This ice can clog your evaporator coils, lead to “no-cool” situations, and eventually trigger the common issues associated with the LG LFXS Series (lawsuit).
Maintenance Cycles
Component | Recommended Care | Why It Matters |
Gasket Surface | Wipe with warm water once a month | Helps remove sticky residue that can wear the vinyl over time |
Magnetic Frame | Clean gently with a damp cloth | Supports a secure magnetic seal and consistent door closure |
Door Hinges | Check alignment every 3 months | Helps keep the door level and reduces strain on the seal |
Ventilation Area | Maintain at least 2 inches of space behind the refrigerator | Promotes proper airflow and helps reduce heat stress on the seal and compressor |
Why Most DIY Repairs Fail
While the steps above seem straightforward, 90% of DIY gasket replacements still result in minor air leaks. Why? Because a gasket is only half the story.
The Hinge Factor: As an LG fridge ages, the door hinges slightly “drop.” A new, stiff gasket will often push a misaligned door away from the frame. A professional technician doesn’t just swap the rubber; we perform a Hinge Alignment & Cam Adjustment to ensure the door sits perfectly square. Without this, your new gasket is useless.
Why Atlanta Trusts Appliance Repair Master
Living in Georgia means dealing with high humidity levels that put constant pressure on your refrigerator’s seal.
With over 15 years of dedicated service in the GA area, Appliance Repair Master understands the specific challenges of the LG ecosystem. Whether it’s the complex mullion removal on a French door model or diagnosing a defrost issue, our technicians bring a vibrant, expert energy to every home. We don’t just fix—we optimize.
The Homeowner’s Maintenance Roadmap
The Healthy Seal Monthly Checklist
- Visual Inspection: Look for “waviness” in the vinyl.
- Touch Test: Run your finger along the seal; it should be smooth, not sticky.
- The Light Test: At night, put a bright flashlight inside the fridge, close the door, and look for light escaping. No light = No leak!
- Clean the Track: Ensure no crumbs are trapped in the retaining clips area.
When to Call Us
- If you see a tear longer than 1 inch.
- If you notice water pooling on the floor.
- If warming with hairdryer doesn’t close the gap.
- If you are uncomfortable with mullion removal and the electrical wiring involved.
Conclusion
Your LG refrigerator is a centerpiece of modern living. It represents the “Life’s Good” promise of innovation and ease. But even the best innovation requires a little care. By solving the issue of LG door seal replacement, you are ensuring that your appliance continues to perform with the same vibrancy it had on day one.
Whether you choose to follow our guide and use your plastic putty knife to tackle the job yourself, or you prefer the white-glove service of our Atlanta-based experts, the goal is the same: uncompromising freshness.
Related guides
FAQ
1. My LG fridge is part of the LFXS series. Should I replace the gasket even if it looks okay?
We’ll get things clear: If you’re experiencing cooling issues, the gasket is the first line of defense. Even if it looks fine, it may have lost its magnetic pull.
2. Why can't I use a metal putty knife?
We always recommend a plastic putty knife. Metal blades can easily slice through the thin plastic door liner. If the liner is punctured, you’ve created a permanent thermal leak that no gasket can fix.
3. How do I know if I have the right gasket parts?
Check the part number against your model number on a trusted site like PartSelect or RepairClinic. LG gaskets are very model-specific, and even a 1/2-inch difference will make the seal useless.
4. Can a bad seal cause my fridge to be loud?
Yes! If the seal is leaking, the fans and compressor have to run at high speed constantly. A quiet fridge is usually a well-sealed fridge.