

You notice it on a Tuesday morning — a thin puddle spreading across the kitchen floor, just in front of the refrigerator. Or maybe it’s been there a few days and you assumed it was a spill. Either way, once you realize your Kenmore is the source, the questions start fast: Where exactly is it coming from? Is it safe to keep using the fridge? How bad is this going to get?
Kenmore water leaking is one of those problems that looks simple on the surface but can originate from half a dozen different places — inside the unit, underneath it, behind it, or from the water supply connections. A water leak that seems to be coming from the front might actually be traveling from a crack in the drain pan at the back. Water that appears on the bottom shelf might be draining from a blocked defrost channel two feet above it.
The other reason not to wait: water damage compounds quickly. A slow drip onto a hardwood or laminate floor causes warping within days. Moisture trapped under the refrigerator creates ideal conditions for mold. And a puddle near an outlet or power strip is a safety issue, full stop.
This article walks through every common source of refrigerator leaks in Kenmore units — what causes them, how to identify them, and what you can realistically handle yourself versus when a technician needs to step in. We offer same-day or next-day service across Atlanta and GA, so if you need help fast, we’re ready.
Leaking from Inside the Refrigerator: Defrost Drain Blockage
If water is pooling on the bottom shelf, dripping onto food, or collecting on the floor directly in front of the refrigerator, the defrost drain is the first place to look. In our service calls at Appliance Repair Master, a clogged defrost drain accounts for roughly half of all Kenmore water leak cases — and it’s one of the more satisfying fixes when you catch it early.
How the Defrost Drain Works
Every frost-free Kenmore refrigerator runs automatic defrost cycles — typically once or twice a day. A heating element briefly warms the evaporator coils, melting any accumulated frost. That meltwater is supposed to flow down a drain channel, through a tube, and into a drain pan underneath the unit, where it evaporates passively.
The drain opening itself is a small hole at the base of the rear wall inside the freezer or fresh food compartment, depending on the model. It’s narrow by design — which means it doesn’t take much to block it.
What Causes the Blockage
Three things clog defrost drains with regularity:
- Food particles — crumbs, small debris, or residue from spills that work their way to the back of the compartment.
- Ice buildup — if the drain partially freezes, subsequent meltwater has nowhere to go and backs up.
- Mineral deposits — in areas with hard water (Atlanta’s water supply has moderate mineral content), calcium and lime accumulate in the drain tube over time.
Once the drain is blocked, meltwater from each defrost cycle has no exit. It pools at the base of the freezer, eventually overflows onto the shelves below, and makes its way to the floor. The water often appears to be coming from inside the refrigerator — because it is.
What You Can Try Yourself
If you’re comfortable doing a bit of hands-on work, a clogged defrost drain is one of the few refrigerator issues with a reasonable DIY path:
- Locate the drain opening — on most Kenmore models, it’s at the center-rear of the freezer floor, sometimes hidden under a plastic cover or ice maker assembly.
- Clear visible ice or debris with a wooden skewer or a turkey baster filled with warm (not boiling) water.
- Flush the drain by slowly pouring warm water into the opening — watch for it to drain freely.
- Check the drain tube exit underneath the refrigerator, near the compressor area — make sure it’s not kinked or blocked where it empties into the drain pa
When It Needs a Professional
If the blockage is deeper in the drain tube, or if ice has built up behind the rear evaporator panel, clearing it requires removing the back panel of the freezer compartment to access the evaporator assembly. This involves disconnecting wiring, handling insulation, and working around the defrost heater — not a job to improvise. If flushing the drain opening doesn’t produce results within a few minutes, that’s the point to call for service.
Leaking from the Back or Bottom: Water Inlet Valve and Connections
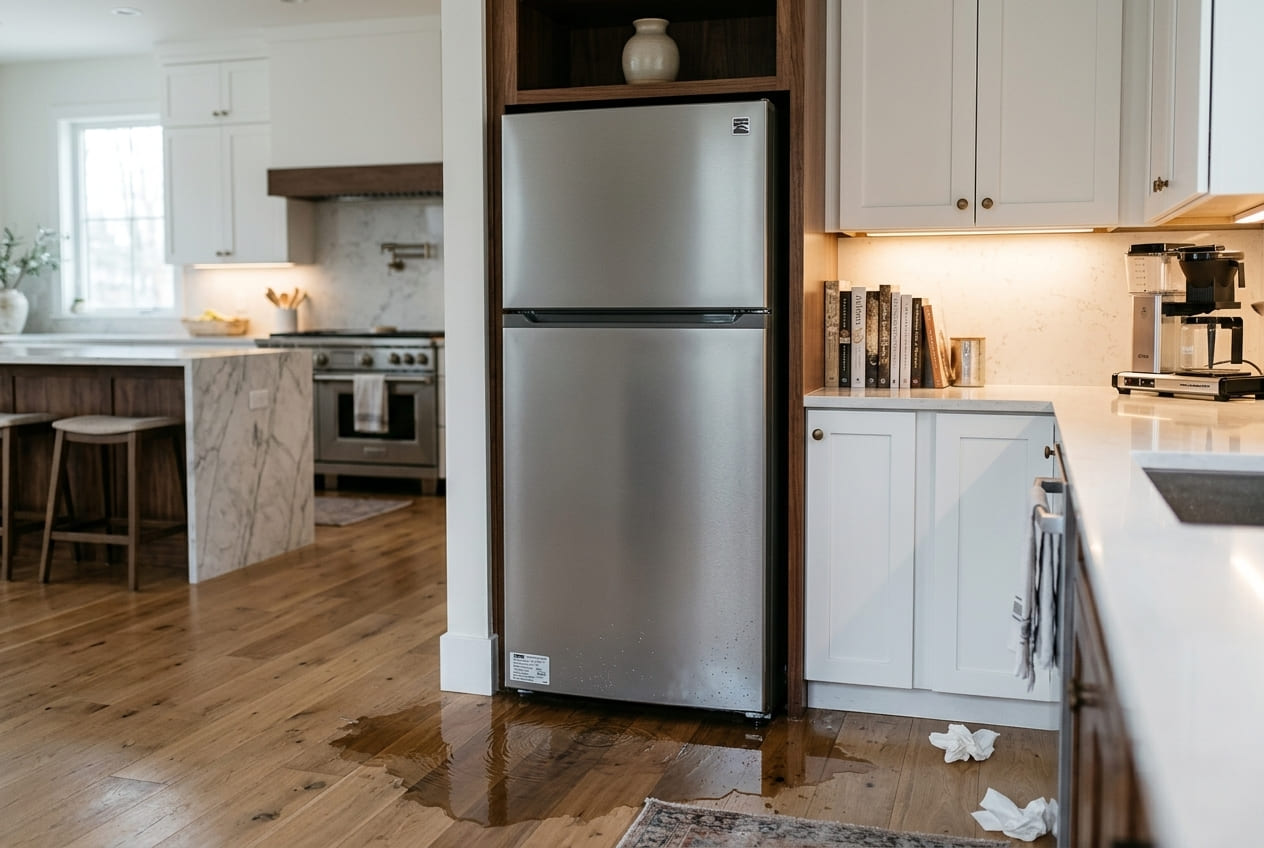
Water appearing at the back of the refrigerator or spreading from underneath toward the rear points to the water supply side of the system. Three components are worth examining here, in order of likelihood.
Water Inlet Valve Deterioration
The water inlet valve connects the household water supply line to the refrigerator’s internal water circuit — feeding both the ice maker and the dispenser. It’s a solenoid-operated valve with rubber seals and a mesh inlet screen, and it handles pressurized water every time ice is made or water is dispensed.
Over time, water inlet valve mineral buildup does real damage. Hard water deposits accumulate on the valve body, the screen, and — critically — on the rubber seals that prevent leakage around the valve housing. As those seals degrade, water begins to seep past them. What starts as a slow drip can become a steady leak, and because the valve is at the back of the unit near the floor, the water often travels before it’s noticed.
This failure pattern accounts for roughly 35% of the back-of-unit leaks we see on Kenmore refrigerators. The fix is valve replacement — the seals aren’t serviceable separately, and a valve that’s leaking from mineral damage will continue to deteriorate.
Signs pointing to the inlet valve:
- Water appears specifically at the lower rear of the refrigerator.
- The leak is more pronounced after the ice maker fills or after using the dispenser.
- Visible white or yellowish mineral crust around the valve body or supply line connection.
Kenmore Water Filter Housing Leak
A Kenmore water filter housing leak is one of the more common post-maintenance surprises. It typically shows up after a filter change — either because the new filter wasn’t seated fully, because a non-compatible filter was installed, or because the O-rings inside the housing were disturbed during the swap.
The housing itself can also crack over time, particularly on older units where the plastic has become brittle. A hairline crack in the filter housing produces a slow, intermittent drip that’s easy to miss until it’s caused visible water damage.
Troubleshooting steps:
- Remove the filter and reinstall it carefully, ensuring it locks into position with a firm quarter-turn.
- Inspect the O-rings on both the filter and the housing for cuts, flattening, or displacement.
- Run the dispenser for 30 seconds and watch the housing closely for any seepage.
- If the housing itself is cracked, it needs to be replaced — sealants are not a reliable fix on a pressurized water component.
Loose Connections and Worn Supply Hoses
The supply line running from the wall shutoff to the refrigerator is worth a visual check once a year. Braided stainless lines are durable, but plastic tubing — still found on older installations — becomes brittle and prone to cracking. Compression fittings at both ends can loosen gradually from the vibration of the compressor.
A loose fitting at the back of the refrigerator produces a drip that’s easy to mistake for a more serious internal leak. Before assuming the worst, pull the unit out and check both connection points: the wall valve and the inlet valve fitting on the refrigerator itself.
Other Sources of Leaks: Drain Pan, Dispenser, and Ice Maker
Once the defrost drain and water supply components are ruled out, three additional sources account for most of the remaining cases.
Cracked Drain Pan
The drain pan sits underneath the refrigerator, directly above the compressor. Its job is to collect the water that drains from the defrost system and allow it to evaporate — the compressor’s heat assists with this. Under normal conditions, you’d never know it was there.
A cracked drain pan changes that equation entirely. Even a small fracture allows water to bypass the evaporation process and drip directly onto the floor. Because the pan is hidden from view and the crack may be minor, this source is easy to overlook — especially since the water appears at the front or sides of the unit, not obviously near the back where the pan is located.
Diagnosis is straightforward: pull the refrigerator away from the wall, remove the lower rear access panel, and inspect the pan visually. Look for cracks, chips along the rim, or discoloration that indicates chronic moisture. Drain pan replacement is one of the simpler repairs on a Kenmore — the part slides out, the new one slides in.
Water Dispenser Dripping
Kenmore leaking from the water dispenser — specifically, a slow drip that continues after you’ve filled a glass and stepped away — is a common complaint, and it’s usually not a sign of a serious problem.
The most frequent cause: an air pocket trapped in the water line after a filter replacement. When a new filter is installed, air enters the system. That air creates inconsistent pressure in the dispenser line, which causes water to dribble out after dispensing stops.
The fix is straightforward: air purge — dispense approximately 1 gallon of water through the dispenser after every filter change. This clears the air from the line and stabilizes the pressure. Most Kenmore owner’s manuals specifically recommend this step, and skipping it is the single most common reason for post-filter-change dripping.
If the dripping persists after purging a full gallon, the dispenser actuator or the dispenser solenoid may need attention — but start with the purge before assuming a mechanical failure.
Ice Maker Overflow or Leaking
Water dripping from the ice maker area — down the inside of the freezer wall, into the ice bin, or onto the freezer floor — typically points to one of two things: the water inlet valve is delivering too much water per fill cycle, or the fill tube is misaligned and water is missing the ice maker mold entirely.
Kenmore ice maker leaking from overfill is often a water pressure issue. If household water pressure exceeds the valve’s rated operating range, the valve may not close fully after a fill cycle, allowing water to continue trickling in. The mold overflows, water freezes where it shouldn’t, and eventually melts and drips down.
If your ice maker is leaking AND not producing ice, there could be a deeper issue at play — see our complete guide on Kenmore Ice Maker Not Working for a full diagnostic breakdown.
Prevention Checklist: Keeping Your Kenmore Leak-Free
Most Kenmore water leaking situations are preventable. The components involved — drain, valve, filter housing, pan — all degrade gradually, and catching them early is almost always cheaper than dealing with the aftermath.
Here’s what we recommend building into your regular maintenance routine:
- Flush the defrost drain every 6 months — a turkey baster with warm water takes five minutes and prevents the most common leak source entirely.
- Replace the water filter on schedule — every 6 months under normal use, sooner if you have high sediment or hard water; an overdue filter strains the housing and connections.
- After every filter change, dispense 1 full gallon of water through the dispenser — this purges air from the line and prevents post-change dripping.
- Inspect the supply line and rear connections annually — pull the unit out, check for mineral buildup around the inlet valve, and confirm the supply line fittings are snug.
- Check the drain pan during deep cleaning — when you’re already pulling the refrigerator out to clean the condenser coils, take 60 seconds to look at the pan for cracks or chips.
- Use filters that are compatible with your specific Kenmore model — non-compatible filters may not seat correctly in the housing, and a poor seal under water pressure will leak.
The pattern we see repeatedly: a water leak that causes $400 in floor damage could have been prevented by a $12 filter change and a five-minute drain flush. Maintenance isn’t glamorous, but the math is hard to argue with.
Conclusion
A Kenmore water leaking situation is rarely catastrophic on its own — but it has a way of becoming one if it’s left alone. The floor damage, the mold risk, the potential for water to reach electrical components: none of these improve with time.
The good news is that the three most common sources — a blocked defrost drain, a deteriorating water inlet valve, and a cracked drain pan — are all diagnosable and fixable without replacing the refrigerator. Many homeowners can handle the defrost drain themselves. The valve and pan are straightforward repairs for a technician with the right parts on hand.
Where things get trickier is when the source isn’t obvious. Water travels. A leak that appears at the front of the unit might originate three feet away. If you’ve worked through the basic checks and still can’t pinpoint the water leak, that’s the right moment to bring in someone with diagnostic experience rather than start replacing parts at random.
At Appliance Repair Master, we’ve tracked down every variation of Kenmore water leak — from a misseated filter O-ring to a cracked evaporator drain tube buried behind the rear panel.
FAQ
1. How quickly should I address a water leak from my Kenmore refrigerator?
Don’t wait on this one. Even a slow drip causes real damage within days — warped flooring, water-stained cabinetry, and mold growth under the unit are all realistic outcomes if the leak is left unaddressed. If you can identify and stop the source yourself (a loose fitting, a misseated filter), do it immediately. If the source isn’t obvious, schedule a diagnostic visit the same day.
2. Can a Kenmore water leak cause mold or damage to my kitchen floor?
Yes to both. Water that collects under a refrigerator sits in a warm, dark, low-airflow environment — exactly the conditions mold needs to establish itself. Hardwood and laminate floors can begin warping within 24–48 hours of sustained moisture exposure. Even tile floors can develop grout damage or allow water to seep into the subfloor. The longer the leak continues, the more expensive the secondary damage becomes.
3. Is it safe to use my refrigerator while it's leaking?
It depends on the source. A dripping dispenser or a slow defrost drain issue doesn’t affect the refrigerator’s cooling function, and the unit is generally safe to use while you arrange a repair. However, if water is pooling near the power cord, the outlet, or any electrical components at the base of the unit, turn the refrigerator off and unplug it until the source is identified.
4. How do I find where exactly the water is coming from?
Dry the floor completely, then place paper towels both in front of and behind the refrigerator. Check them after 2–3 hours. Water appearing at the front typically points to the defrost drain or drain pan. Water at the back points to the inlet valve or supply line. Water inside the unit — on shelves or the floor of the compartment — almost always traces back to the defrost drain. This simple test narrows the field significantly before any disassembly.
5. Can a power outage cause my Kenmore to start leaking water?
Indirectly, yes. A prolonged outage causes frost and ice to melt inside the freezer compartment. If the defrost drain is even partially restricted, that sudden volume of meltwater can overwhelm it and overflow onto the floor. If you notice a leak shortly after a power outage, the defrost drain is the first thing to check — and it’s worth flushing it proactively after any extended power interruption.
6. How often should I check my Kenmore refrigerator's water connections?
Once a year is a reasonable baseline for a visual inspection of the supply line, inlet valve, and filter housing. If you have hard water, bump that to every six months — mineral buildup accelerates wear on seals and valve components. Any time you change the water filter is also a natural moment to check the housing and connections, since you’re already working in that area.