
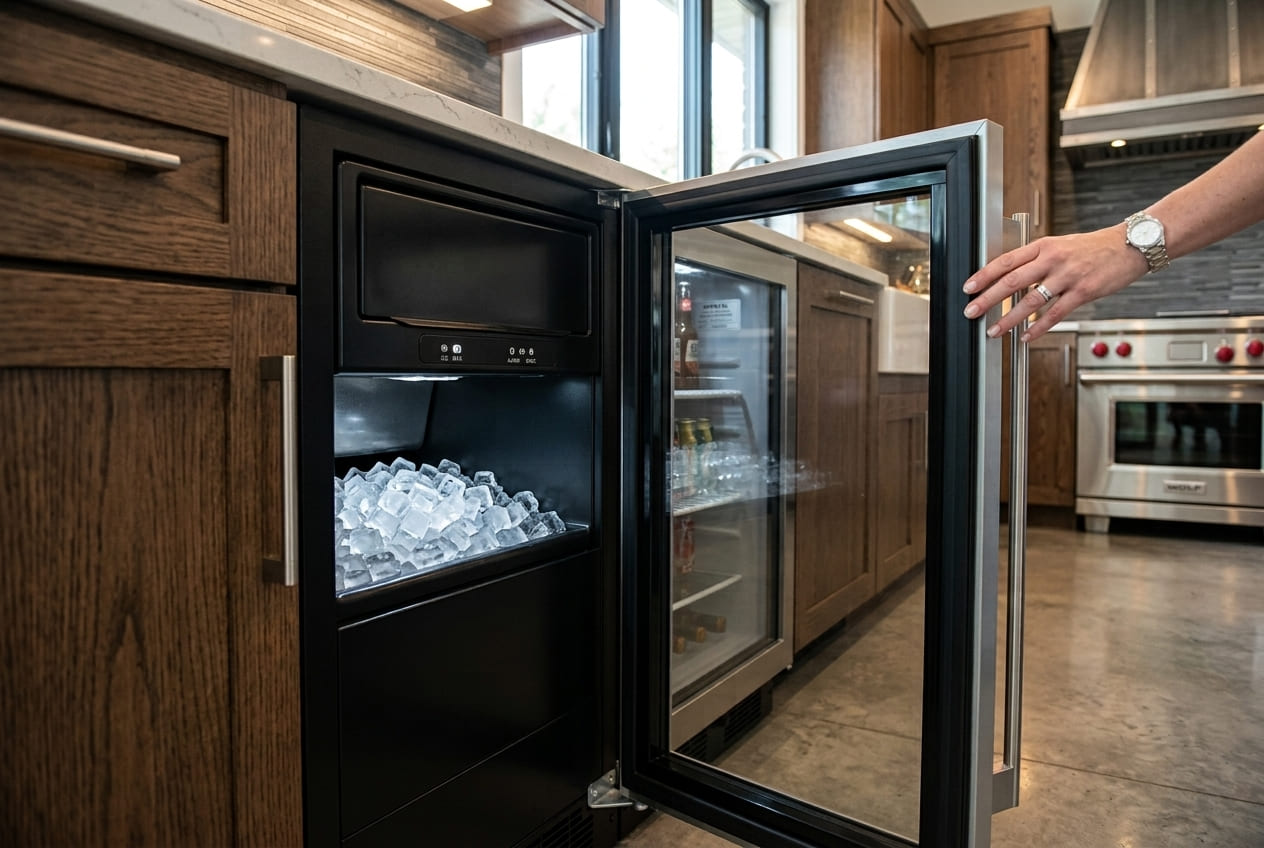
You open the storage bin and find it empty. Or worse — you pull out a batch of thin, hollow cubes that fall apart before they make it into a glass. Your Marvel Ice maker was working fine, and now it isn’t. What changed?
Same symptom turns up on other brands too – start with our guide to Bosch ice maker not working.
Marvel undercounter Ice makers are built differently from the Ice makers in standard refrigerators. A typical refrigerator ice maker uses a freezing tray and a mechanical arm to drop cubed ice into a bin. Marvel Clear Ice models use a chill plate system — a molded metal plate with a cell matrix that forms individual cubes directly in place. Water circulates over the plate, freezes into the cells, and is released by briefly warming the plate from the inside using hot refrigerant gas. It’s a more sophisticated process, with more components, and more things that can fail.
The good news: most Marvel Ice maker failures trace back to one of seven specific causes. Some of them — water supply problems and mineral buildup — are owner-resolvable. The rest require professional diagnosis. This guide walks through all seven, in order of frequency, so you can identify your situation and take the right next step.
One practical note before we get into causes: if your Marvel Ice maker is producing ice but you’re also seeing water on the floor or inside the unit, that points toward a drain valve problem that overlaps with water leak symptoms.
Before Troubleshooting: Understanding How Marvel Makes Ice
Skipping this section is tempting — but understanding how the system works is the fastest way to understand why it fails. This isn’t background reading for its own sake; it’s the context that makes the seven causes in the next section make sense.
Here’s how a Marvel Clear Ice chill plate system completes an ice-making cycle:
Step 1 — Fill. The inlet valve opens and water flows into the reservoir at the base of the unit. A circulation pump draws water upward and distributes it across the surface of the chill plate.
Step 2 — Freeze. As water flows continuously over the cold plate, it freezes directly into the plate’s cell matrix. The chill plate on Marvel Clear Ice units is not a flat surface — it’s a molded cell matrix, with each cell forming one individual cube. Water freezes into these cells, so the cubes are already separated by the geometry of the plate itself. There is no cutting step. A thermistor that monitors chill plate temperature tracks how cold the plate is and signals the control board when ice has formed to the correct thickness.
Step 3 — Release (Harvest). When the thermistor signals that ice is ready, the hot gas bypass valve opens. The compressor continues running, but instead of sending refrigerant through the normal cooling loop, the valve diverts hot refrigerant gas directly through the chill plate evaporator. The plate warms briefly from the inside — just enough for the formed cubes to release from their cells and drop into the storage bin under their own weight. No separate heating element is involved in this step.
Step 4 — Drain. Unfrozen water — water that didn’t freeze during the cycle — exits through the drain valve and drain line. If the drain valve doesn’t close correctly between cycles, water escapes when it shouldn’t. If it doesn’t open, water backs up inside the unit.
Every one of those four steps is a potential failure point. Add the refrigerant system that keeps the chill plate cold and the control board that coordinates the entire sequence, and you have seven distinct failure modes — each with its own symptoms.
Seven Reasons Your Marvel Ice Maker Stopped Working — and What to Look For
Each cause below gets a full explanation rather than a summary. The goal is to give you enough information to identify which cause matches your symptoms — and to understand what’s required to fix it.
Cause 1: Water Supply Problems — Pressure Too Low, or the Wrong Water Type
Marvel Ice makers require a water supply pressure between 20 and 120 psi. Below 20 psi, the unit can’t fill the reservoir adequately, leading to thin ice, incomplete cycles, or no ice production at all. Above 120 psi, the inlet valve is at risk of damage — high pressure can force water past a closed valve, causing slow drips or continuous filling that disrupts the cycle.
Diagnosing water pressure doesn’t require a plumber. A simple residential pressure gauge — available at any hardware store for under $20 — threads onto a hose bib or laundry hookup and gives you a reading in seconds. If you’re below 20 psi, the issue is your home’s water supply or the saddle valve connection to the Ice maker line. A kinked supply line or a partially open saddle valve are common culprits and straightforward to check.
Beyond pressure, Marvel recommends against using softened or de-ionized water in their Ice makers. De-ionized water in particular can behave unexpectedly on the chill plate, affecting how evenly and fully ice forms in the cell matrix. Softened water may alter the freeze cycle timing and interfere with chill plate performance. If you’ve recently installed a whole-house water softener, confirm whether the Ice maker supply line bypasses the softener. Marvel’s guidance is to use standard filtered tap water — not treated, softened, or de-ionized.
Cause 2: Mineral Buildup on the Chill Plate — the Number One Ice Quality Problem
This is the most common cause of poor ice quality in Marvel undercounter Ice maker models, and it’s almost entirely preventable with regular maintenance. When hard water minerals — primarily calcium and magnesium — deposit on the surface of the chill plate over time, they create a thin layer of limescale. That layer affects how cleanly water freezes into the cell matrix and how completely finished cubes release during the harvest cycle.
The classic signs are thin ice that is translucent rather than opaque, hollow cubes with an air pocket in the center, cubes that stick together in the bin, or slower-than-normal cycle times. If you can see white or chalky deposits on the chill plate surface when you look inside the unit, mineral buildup is almost certainly your problem.
The fix is a descaling procedure, which we cover step-by-step in Section 5 below. In Atlanta’s water conditions — which trend toward moderately hard water across most metro-area zip codes — descaling every six to twelve months maintains chill plate performance. If ice quality is declining faster than that, moving to a four-to-six-month schedule is reasonable.
One important note: if the plate has been heavily scaled for a long time, mineral deposits can settle into the cell matrix grooves and affect ice release even after a standard descale. A technician can assess whether the plate surface has been compromised and whether a more thorough cleaning is needed.
Cause 3: Thermistor or Cycle Signal Failure

The thermistor that monitors the chill plate temperature is a small but critical component. Its job is to send a resistance signal to the control board indicating how cold the plate is. When that signal tells the board that the plate has reached the right temperature, the board opens the hot gas bypass valve and begins the harvest cycle. When the signal falls outside the expected range, the board loses its reference point for the cycle.
A failed thermistor can produce two opposite symptoms depending on how it fails:
- If it reads as too warm (or fails entirely), the board may never trigger the harvest cycle — the plate keeps freezing indefinitely and cubes never drop. You’ll see ice building up inside the cell matrix with nothing in the bin.
- If it reads as too cold prematurely, the board may trigger an early harvest — cubes release before they’ve fully formed, producing consistently thin or incomplete ice despite the water supply and plate being otherwise functional.
Thermistor testing requires a multimeter and knowledge of the expected resistance values for the specific model. Accessing the thermistor typically means removing interior components. This is not a DIY repair — not because the sensor replacement itself is especially complex, but because of the access requirements and the need to confirm the correct resistance specification for your model. A professional diagnosis is the right move here.
Cause 4: Drain Valve or Circulation Pump Malfunction
The drain valve and circulation pump work at opposite ends of the water cycle, and a failure in either one disrupts ice production in distinct ways.
The drain valve controls when water exits the system. After each ice cycle, it opens to allow unfrozen water to drain out before the next fill begins. If the drain valve is stuck open, water drains continuously — even during the freeze phase — so the chill plate never has a full film of water to freeze, resulting in thin or absent ice. If it is stuck closed, water that should drain stays in the reservoir, backing up the system and producing unusual ice formation or pooling inside the unit.
The circulation pump keeps water moving over the chill plate during the freeze phase. Still water freezes unevenly — you get cubes that are thicker on one side, or cells that fill completely while adjacent ones barely freeze. A pump running sluggishly often shows up as inconsistent ice quality before it fails completely. A pump that stops entirely results in poor water coverage across the plate matrix.
Both components are accessible but require unit disassembly for replacement. A stuck drain valve is also a common source of water leak symptoms — if Marvel Ice maker drainage problems are causing water to pool inside or under the unit, see our Marvel water leak guide for the full location-based diagnostic.
Cause 5: Hot Gas Valve Failure — Ice Won't Release From the Plate
When the thermistor signals that ice has fully formed in the chill plate cells, the hot gas bypass valve opens. The compressor continues running, but the valve redirects hot refrigerant gas through the chill plate evaporator rather than the normal cooling loop. The plate warms briefly from the inside, and the cubes release from their cells and drop into the storage bin under their own weight.
If the hot gas valve fails — either stuck closed or not opening fully on command — the harvest step never happens. The compressor keeps running in freeze mode, and ice accumulates in the cell matrix without releasing. Over time, that buildup layers on itself until the cells are completely blocked and the system jams.
From the outside, this looks similar to a thermistor fault: ice is on the plate, nothing is in the bin. The distinction matters for diagnosis. With a thermistor fault, the board never sends the signal to harvest. With a stuck hot gas valve, the board sends the signal but the valve doesn’t respond. A technician will test the valve’s electrical operation and refrigerant flow to distinguish between the two.
A hot gas valve that is stuck partially open creates a different problem: the plate never gets fully cold because warm refrigerant is continuously bleeding into the evaporator circuit. Cycle times extend, ice formation is slow, and cubes may be soft or undersized even when they do release.
Hot gas valve replacement is a professional repair. The component is internal to the refrigerant circuit and requires proper tools and handling to service correctly.
Cause 6: Low Refrigerant or Compressor Issues Affecting the Chill Plate
If the chill plate doesn’t get cold enough to form ice — or takes an unusually long time to cool down — the issue may be in the sealed refrigerant system itself. Low refrigerant charge or a struggling compressor reduces the system’s ability to deliver sufficient cold to the plate matrix.
The signs are different from a thermistor or hot gas valve failure: in this scenario, the plate is physically not reaching operating temperature, rather than a control or valve issue preventing the cycle from completing correctly. You’ll notice the chill plate feels only slightly cool during a cycle when it should feel very cold, and cycle times extend significantly as the compressor works harder for less result.
This is a professional-only repair, full stop. Refrigerant diagnosis and handling requires EPA certification — it is not a DIY repair under any circumstances. If you suspect a sealed system issue, the right move is to stop running the unit and call a technician. Continuing to run a unit with low refrigerant stresses the compressor and can turn a refrigerant recharge into a compressor replacement.
Cause 7: Control Board or Sensor Communication Failure
The control board coordinates the entire cycle — it receives the thermistor’s temperature signal, activates the inlet valve, runs the circulation pump, opens the hot gas bypass valve at the right moment, and triggers the drain valve in the correct sequence. A faulty control board can send incorrect signals to any of those components, causing the Ice maker to skip steps, get stuck mid-cycle, or stop attempting cycles entirely.
The symptom pattern that points toward a control board failure rather than a single-component fault is typically erratic behavior: the unit starts a cycle and stops partway through; ice production is inconsistent from batch to batch with no other clear cause; or the unit was working normally and stopped suddenly without any mechanical explanation.
Control board replacement is a professional repair. The board must be matched to the specific model, and replacing it without first confirming it’s actually at fault — rather than a thermistor sending bad data that makes the board appear faulty — results in an expensive unnecessary part swap. A technician will test the downstream components before concluding the board itself has failed.
5 Things to Check on Your Marvel Ice Maker Right Now
Before calling a technician, run through this quick checklist. These are owner-accessible checks that take five minutes and occasionally reveal a simple explanation.
- Is the Ice maker actually switched on?
Some Marvel undercounter Ice maker models have a dedicated power switch separate from the main unit power. Check the control panel or the interior wall of the unit for a separate Ice maker on/off switch. It sounds obvious, but it gets missed. - Is water reaching the unit?
Go to the water supply valve — typically a saddle valve on a cold water line under the sink or behind the unit. Confirm it’s fully open, then trace the supply line to the unit and check for kinks or pinching. A kinked line can restrict flow enough to starve the Ice maker even if the valve is fully open. - Is the chill plate iced over and not releasing?
Open the unit and look at the chill plate. If you see ice built up in the cells with nothing dropping into the bin, the harvest cycle is not completing — either the thermistor isn’t triggering it or the hot gas valve isn’t responding. Don’t attempt to chip the ice away manually. Unplug the unit and allow it to defrost naturally, then assess before plugging back in. - Is there visible mineral buildup on the chill plate?
Look for white, chalky, or crystalline deposits on the plate surface and inside the cell matrix grooves. Even a thin layer of limescale affects ice formation and release noticeably. If you see it, a descaling procedure (Section 5 below) is your first move. - Is there water pooling inside or under the unit?
Water pooling at the bottom of the unit interior often points to a drain valve issue. Water pooling on the floor under the unit suggests a drain line or connection problem. See our Marvel water leak guide for a full location-based diagnostic.
How to Remove Mineral Buildup From a Marvel Chill Plate (Descaling Procedure)
If your inspection confirmed mineral buildup — or if you haven’t descaled in over a year and ice quality has been declining — this procedure restores the chill plate and cell matrix to clean operating condition.
Use a food-safe descaling solution specifically formulated for Ice makers. Follow the concentration instructions on the product label. Do not substitute vinegar — it doesn’t fully break down calcium-based deposits and can leave residue that affects ice flavor.
Step 1 — Turn off the Ice maker and close the water supply valve. Isolate the unit from its water source before starting.
Step 2 — Drain the reservoir. Remove remaining water from the reservoir at the base of the unit. Most Marvel models have a drain plug or a manual drain option accessible through the control panel — check your owner’s manual for the specific procedure for your model.
Step 3 — Mix the descaling solution. Prepare the solution per the manufacturer’s concentration instructions, using the quantity appropriate for your reservoir size.
Step 4 — Introduce the descaling solution. Pour the prepared solution into the reservoir. On models with a dedicated clean cycle, activate it now — the pump will circulate the descaler over the chill plate and into the cell matrix. On models without a clean cycle, allow the solution to sit for the contact time specified on the product label (typically 20–30 minutes).
Step 5 — Run the circulation cycle. If your model has a clean cycle, allow it to run to completion. The descaling solution circulates over the plate, dissolving mineral deposits from the cell matrix surface on contact.
Step 6 — Rinse — twice. Drain the descaling solution fully, then fill with fresh clean water and run a complete rinse cycle. Drain completely. Repeat the rinse a second time. Two full rinse cycles are the minimum to ensure no descaling residue remains before the Ice maker produces ice.
Step 7 — Inspect the plate. After rinsing, examine the chill plate and cell matrix. The surface should be clean and free of white deposits. If residual buildup remains in the cell grooves, a second descaling session may be needed before resuming normal operation.
Step 8 — Restore water supply and resume operation. Open the supply valve, allow the reservoir to fill, and monitor the first two or three ice cycles. Ice quality typically improves within the first cycle after a successful descale; full improvement is usually visible by the second or third batch.
In most Atlanta water conditions, descaling every six to twelve months is sufficient to maintain performance and protect the chill plate surface.
Marvel Ice Maker Repairs You Should Not Attempt Yourself
Not every Ice maker problem has an owner-accessible fix. The table below is a quick reference for what’s in your lane and what requires a technician.
Repair Task | DIY Safe? | Why |
Descaling the chill plate | ✓ Yes | Owner-accessible with food-safe descaler; no disassembly required |
Checking and replacing the saddle valve on the supply line | ✓ Yes (simple valve) | Basic plumbing; no refrigeration knowledge required |
Thermistor testing and replacement | ✗ No — call a tech | Requires panel removal, multimeter testing, model-specific resistance values |
Drain valve replacement | ✗ No — call a tech | Internal component; requires disassembly and correct reassembly |
Hot gas bypass valve diagnosis and replacement | ✗ No — call a tech | Refrigerant circuit component; specialized tools and handling required |
Refrigerant system diagnosis or recharge | ✗ No — EPA cert. required | Sealed system; refrigerant handling requires EPA certification |
Control board replacement | ✗ No — call a tech | Must confirm board failure vs. sensor fault first; model-specific part |
The practical takeaway: descaling and checking the water supply are legitimate owner-maintenance tasks. Everything else involves internal access, specialized tools, model-specific technical knowledge, or EPA-regulated refrigerant work.
Prevent Ice Maker Problems Before They Start: Four Maintenance Habits
Marvel Ice maker troubleshooting becomes much less frequent when the unit receives consistent maintenance. These four habits address the most common failure precursors.
- Descale every six to twelve months. In Atlanta-area water conditions, six months is the more conservative and reliable interval. If you’ve been going longer and ice quality has been slipping, don’t wait — start now and reset the schedule from there.
- Check water pressure annually. Pressure can shift — from changes in your home’s plumbing, a failing pressure regulator, or fluctuations in the municipal supply. A quick reading at the supply line once a year catches out-of-range pressure before it damages the inlet valve or disrupts the fill cycle.
- Inspect the chill plate before summer. Atlanta tap water tends toward slightly harder mineral content in summer months as water sources shift seasonally. Checking the cell matrix before the summer peak — and descaling proactively if you see early buildup — prevents mid-season performance problems.
- Keep the condenser coils clean. The same condenser that cools the refrigerant also maintains the chill plate at operating temperature. A condenser clogged with dust and lint can’t shed heat efficiently, the refrigerant system runs warmer, and the chill plate takes longer to reach freeze temperature. Cleaning the condenser and resetting the cL maintenance code (see our Marvel error codes guide) directly supports consistent ice production — it’s not a separate maintenance category, it’s part of the same system.
Conclusion
The causes of Marvel Ice maker not working fall into two groups. Two of them — water supply problems and mineral buildup on the chill plate — are owner-resolvable. Check your water pressure, confirm the supply valve is fully open and the line isn’t kinked, and descale the chill plate if you see buildup or haven’t done it in over a year. Those two steps resolve a meaningful share of ice quality complaints without any professional involvement.
The remaining five — thermistor failure, drain valve or pump malfunction, hot gas valve failure, refrigerant system issues, and control board faults — all require professional diagnosis and repair. They involve internal component access, specialized testing, or EPA-regulated refrigerant work.
One important cascading risk: mineral buildup that’s ignored long enough doesn’t stay just a descaling problem. Persistent scale in the cell matrix forces longer freeze cycles, which adds cycle stress to the hot gas valve and the circulation pump. What starts as a preventable descaling job can become a multi-component repair if left unaddressed for too long.
If you’re hearing unusual sounds from the unit alongside ice production problems, compressor and fan components may be under stress. And if water is pooling inside the cabinet or on the floor, the connection to drain valve failure is covered in full in our Marvel water leak guide. For Atlanta homeowners with Marvel Ice maker questions or a unit that needs hands-on service, Appliance Repair Master is your local specialist — same-day appointments available across the Atlanta metro and throughout Georgia.
If the fix above does not hold, our Atlanta appliance repair team can take it from here.
Related guides
FAQ
1. My Marvel Ice maker is running through its cycle but not releasing any ice — what's going on?
This pattern most commonly points to a hot gas bypass valve that isn’t opening correctly, or a faulty chill plate thermistor that isn’t signaling the end of the freeze cycle. When the harvest step doesn’t trigger, ice stays locked in the cell matrix and accumulates with each cycle. From the outside, both causes look the same — ice on the plate, nothing in the bin — but the diagnostic path is different. A hot gas valve fault means the board is sending the harvest signal but the valve isn’t responding. A thermistor fault means the board never sends the signal at all. Both require professional diagnosis and component replacement.
2. Why is my Marvel Ice maker producing ice that looks thin or hollow?
Thin or hollow cubes are the classic sign of mineral buildup on the chill plate cell matrix. Limescale deposits in the cell grooves prevent water from fully filling and freezing in each cell, producing undersized or incomplete cubes. A descaling procedure (Section 5 above) typically restores full ice production within two to three cycles. If ice quality doesn’t improve after descaling, the next suspects are the thermistor triggering a premature harvest cycle, or water supply pressure falling below the 20 psi minimum — both require professional evaluation.
3. My Marvel Ice maker's water line has good pressure, but ice production seems slow. Could it be the water type?
Yes — and this cause is frequently overlooked. Marvel recommends against softened or de-ionized water in their Ice makers. Softened water’s altered mineral profile affects how water interacts with the chill plate cell matrix during the freeze phase, which can slow cycle completion or produce irregular results. If you’ve recently had a water softener installed, confirm whether the Ice maker supply line bypasses the softener. A technician can evaluate the specific impact on your model if the issue persists.
4. Water is pooling inside my Marvel Ice maker — is this a drain valve problem?
Pooling water inside the unit most commonly points to a stuck-open drain valve — water escaping the system during the freeze phase — or a blocked drain line preventing water from exiting after the cycle. If water is pooling on the chill plate surface itself rather than at the bottom of the cabinet, a failed circulation pump may be preventing proper water distribution across the plate. For water appearing on the floor under the unit, see our Marvel water leak guide for a full source-location diagnostic.
5. I just moved my Marvel Ice maker to a new location — now it's not making ice. What should I check first?
Three checks after a move, in order. First, confirm the unit is level — front-to-back tilt affects how water distributes across the chill plate cell matrix, and improper leveling can prevent even ice formation. Second, confirm the water supply line is reconnected and the supply valve is fully open. Third, allow the unit 24 to 48 hours to stabilize at operating temperature before concluding there’s a fault — the refrigeration system needs time to normalize at the new location. If none of those explain the problem, a wiring connection displaced during the move — particularly the thermistor connector — is worth having a technician check.
Featured Q&A
1. Why is my Marvel Ice maker not working?
The most common causes of Marvel Ice maker not working are water supply pressure outside the required 20–120 psi range, mineral buildup in the chill plate cell matrix, a failed thermistor, drain valve malfunction, or a hot gas bypass valve that isn’t opening during the harvest cycle. A professional diagnosis is the fastest way to identify which specific component has failed, since several causes produce overlapping symptoms.
2. How do I fix a Marvel Ice maker that produces thin or hollow ice?
Thin or hollow cubes almost always indicate mineral buildup on the chill plate. A descaling procedure using a food-safe descaling cleaner typically restores full ice production within two to three cycles. If ice quality doesn’t improve after descaling, the thermistor or water supply pressure may be the underlying cause — both require professional evaluation.
3. Can a Marvel Ice maker be repaired, or does it need replacement?
Most Marvel Ice maker failures — including thermistor faults, drain valve issues, and hot gas valve problems — are repairable without replacing the whole unit. Only extensive sealed system damage or compressor failure typically makes full replacement the better option, and even those scenarios are worth a professional assessment before deciding.
4. How often should I clean my Marvel Ice maker?
Descaling the chill plate every six to twelve months is the standard recommendation for most installations. In areas with harder water — or in Atlanta during summer months when mineral content in tap water tends to be slightly higher — moving to a four-to-six-month schedule maintains ice quality and protects the cell matrix surface from long-term deposit buildup.